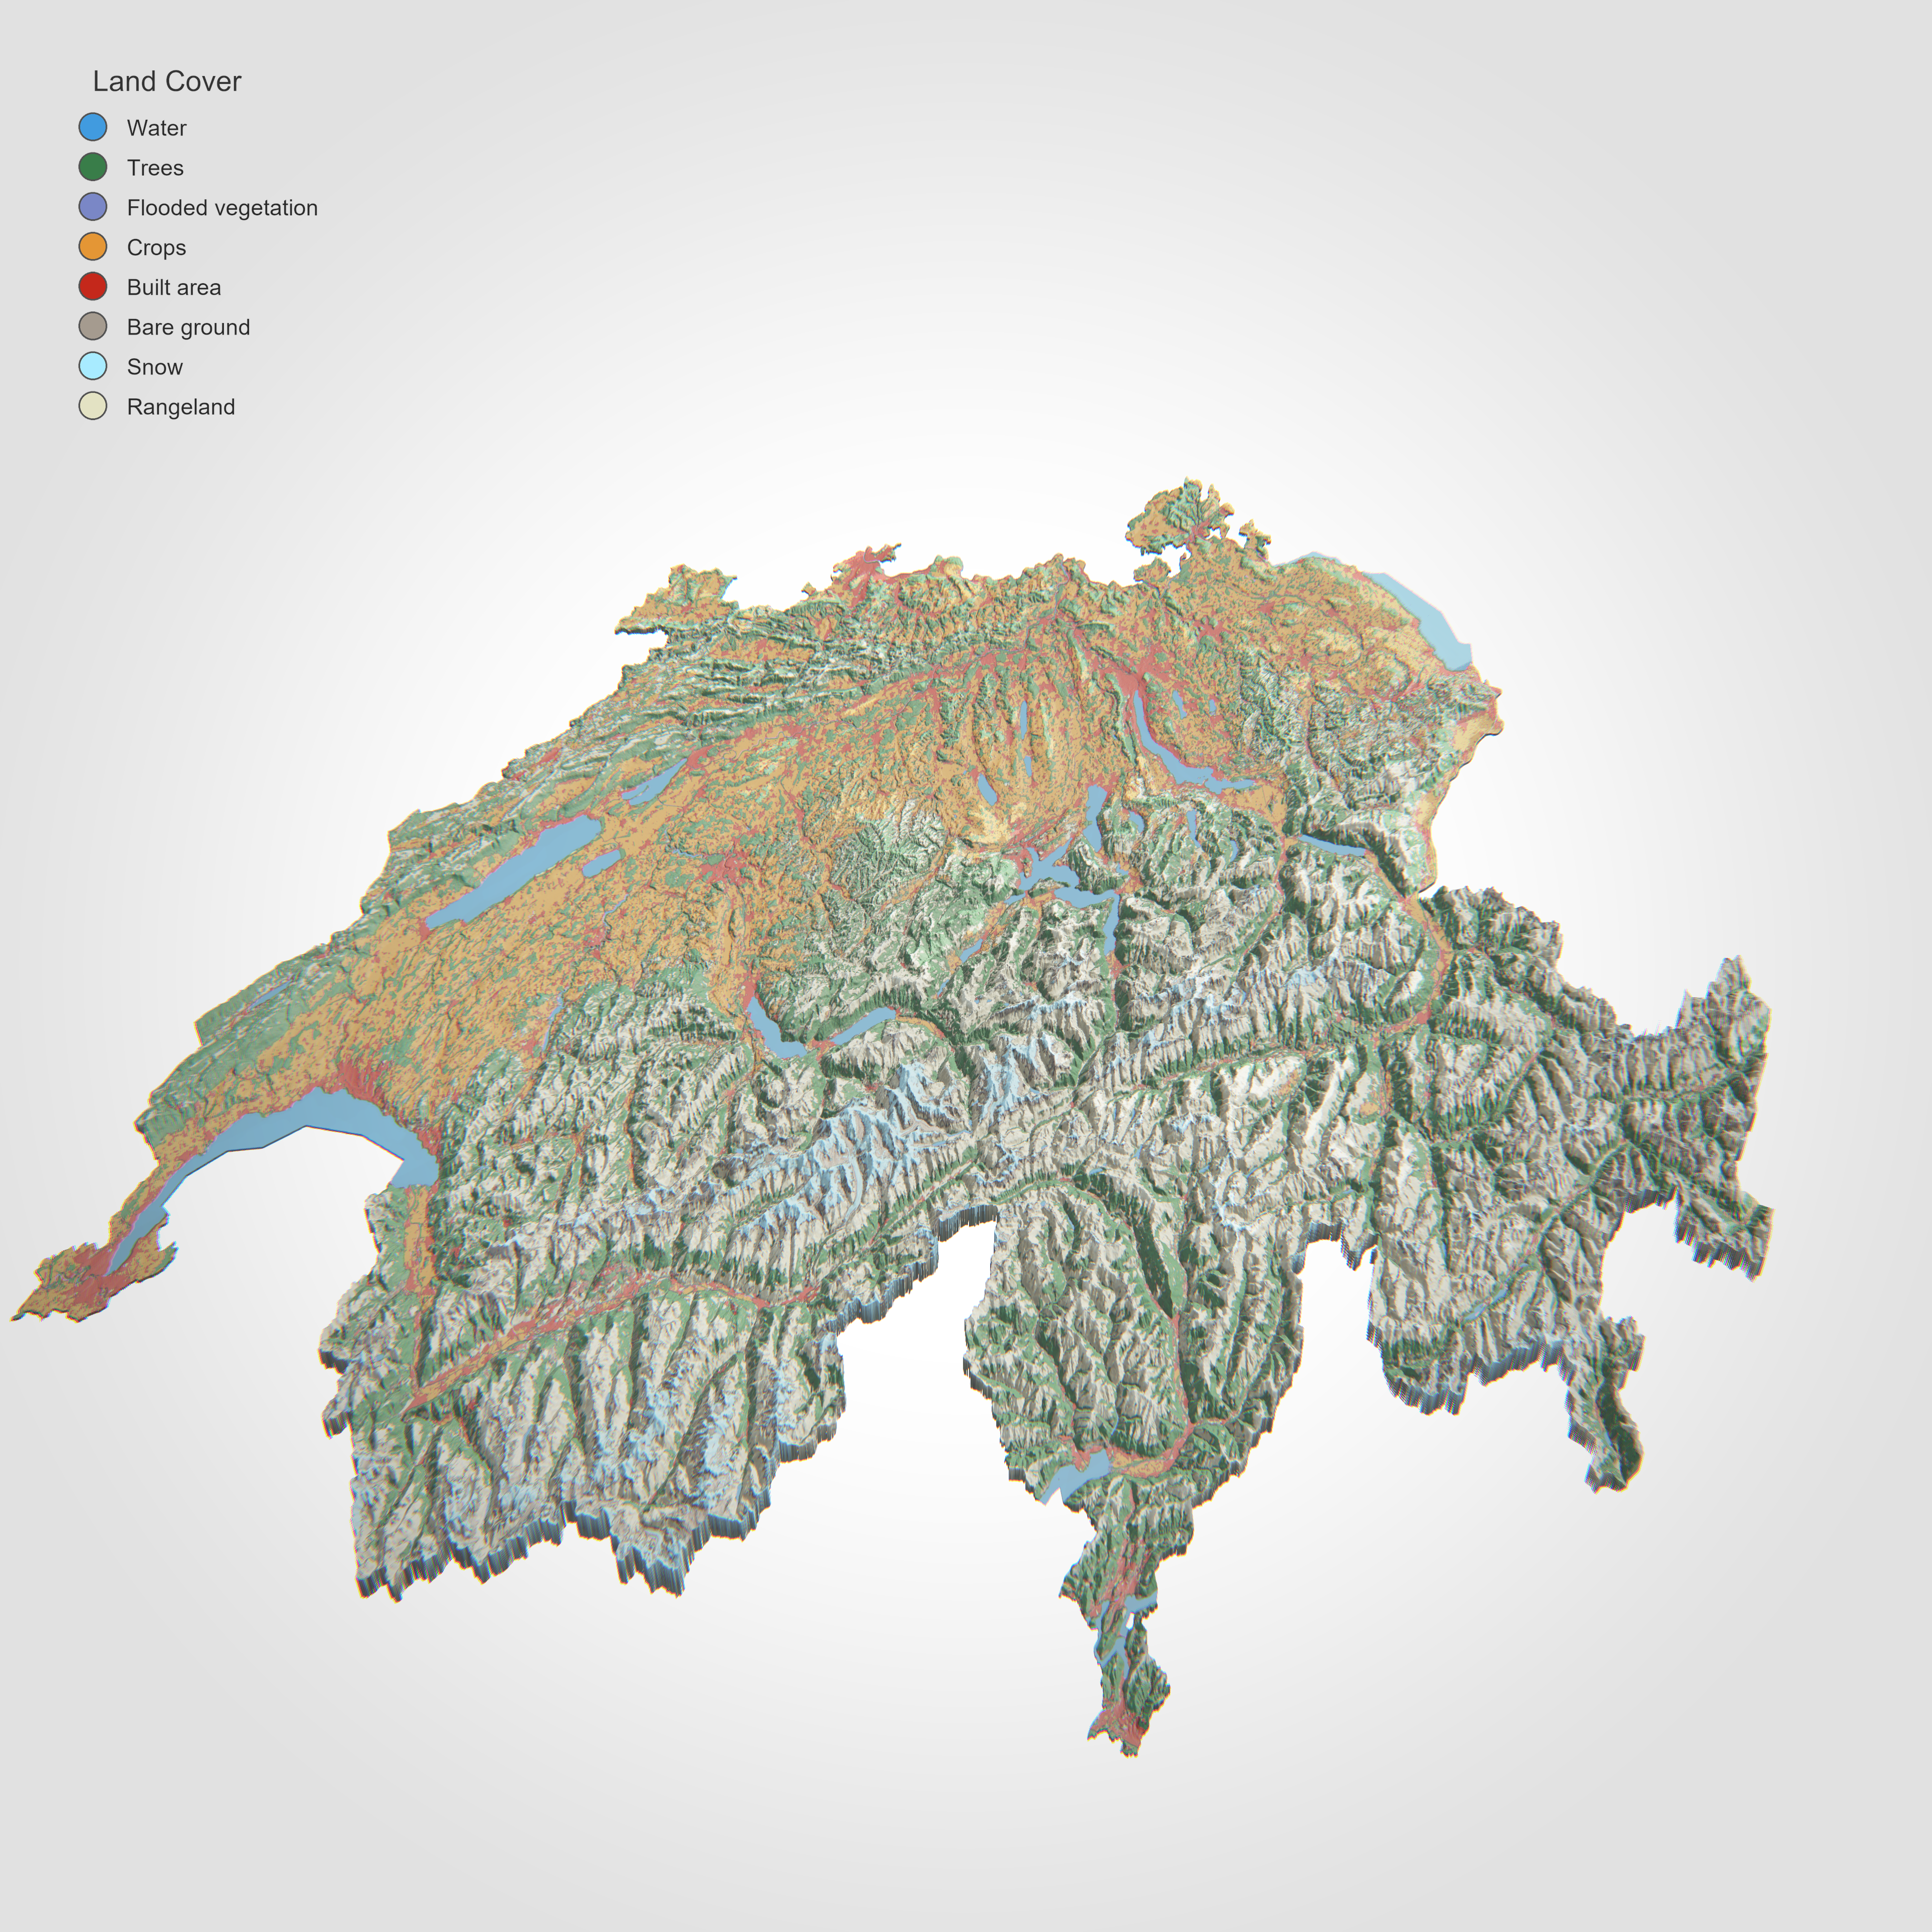
Drape Overlays On Terrain
Raster overlays stay in the main viewer path: load terrain, add a named layer,
then adjust opacity and draw order. The polished Swiss scene below is the same
one rendered by scripts/regenerate_gallery.py.
Example: Swiss DEM plus land-cover overlay
import forge3d as f3d

dem_path = f3d.fetch_dem("swiss")
overlay_path = f3d.fetch_dataset("swiss-land-cover")

with f3d.open_viewer_async(terrain_path=dem_path, width=1500, height=960) as viewer:
    viewer.load_overlay(
        name="land-cover",
        path=overlay_path,
        opacity=0.82,
        z_order=10,
        preserve_colors=True,
    )
    viewer.set_orbit_camera(phi_deg=90, theta_deg=10, radius=18000)
    viewer.set_sun(azimuth_deg=315, elevation_deg=17)
    viewer.snapshot("swiss-land-cover.png")
Gallery-backed script
The gallery image for this workflow comes from
examples/swiss_terrain_landcover_viewer.py, invoked by
scripts/regenerate_gallery.py with a higher-quality preset:
python examples/swiss_terrain_landcover_viewer.py ^
  --preset hq4 ^
  --crs EPSG:2056 ^
  --width 3840 --height 3840 ^
  --cam-radius 18000 ^
  --cam-phi 90 ^
  --cam-theta 10 ^
  --cam-fov 16 ^
  --zscale 0.03 ^
  --no-solid ^
  --background "#ffffff" ^
  --sun-azimuth 315 ^
  --sun-elevation 17 ^
  --ambient 0.14 ^
  --sun-intensity 1.54 ^
  --shadow-strength 0.76 ^
  --ibl-intensity 0.13 ^
  --overlay-opacity 0.82 ^
  --legend-position northwest ^
  --legend-scale 0.22 ^
  --msaa 8 ^
  --shadow-technique pcss ^
  --exposure 1.24 ^
  --snapshot swiss-land-cover.png
When you need vector overlays
The high-level viewer wrapper currently exposes raster drape loading directly. For custom vector geometry, drop to raw IPC:
viewer.send_ipc(
    {
        "cmd": "add_vector_overlay",
        "name": "ridge-line",
        "vertices": [
            [0.0, 0.0, 0.0, 0.95, 0.3, 0.2, 1.0],
            [50.0, 20.0, 0.0, 0.95, 0.3, 0.2, 1.0],
            [90.0, 35.0, 0.0, 0.95, 0.3, 0.2, 1.0],
        ],
        "indices": [0, 1, 1, 2],
        "primitive": "lines",
        "drape": True,
        "line_width": 3.0,
    }
)
That is the same IPC surface the lower-level helpers in forge3d.viewer_ipc
wrap for scripts. If you want the exact published render, follow the gallery
script above or start from Swiss Land-Cover.
Next: Build A Map Plate
Expected output